


Corsair Flash Voyager Port

Backup Wizard
Â
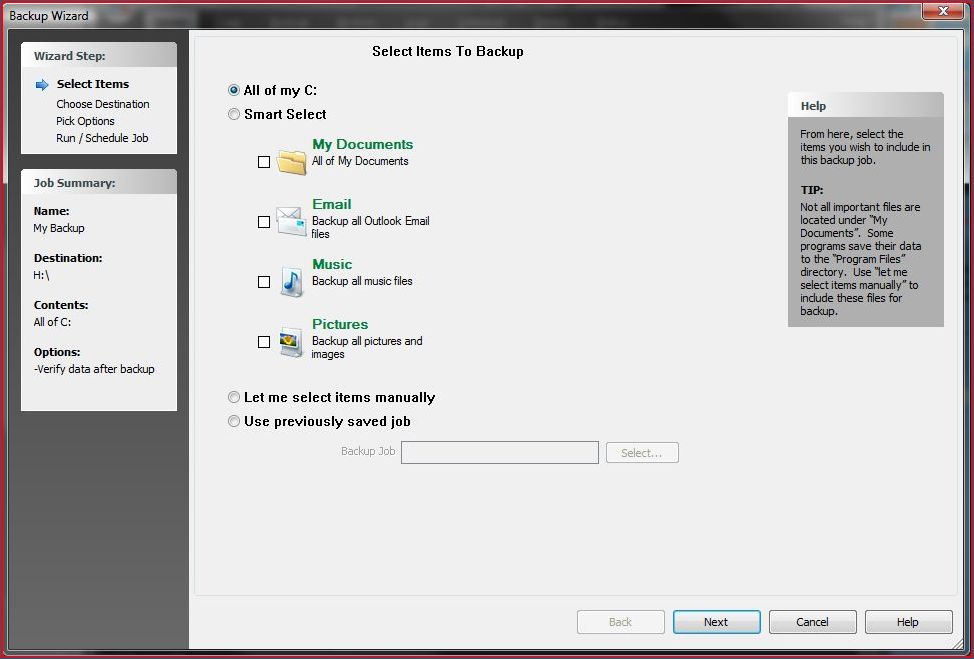
The feature which will be most used is the backup wizard, so I will be focusing on that for today’s review. Upon clicking the icon a separate window is opened, and you are asked what you wish to backup. The Smart Select is a nice feature, allowing you to quickly select only the most common folders. If you wish to select other files and folders not listed, then you will need to click ‘Let me select items manually’.
Â
Â
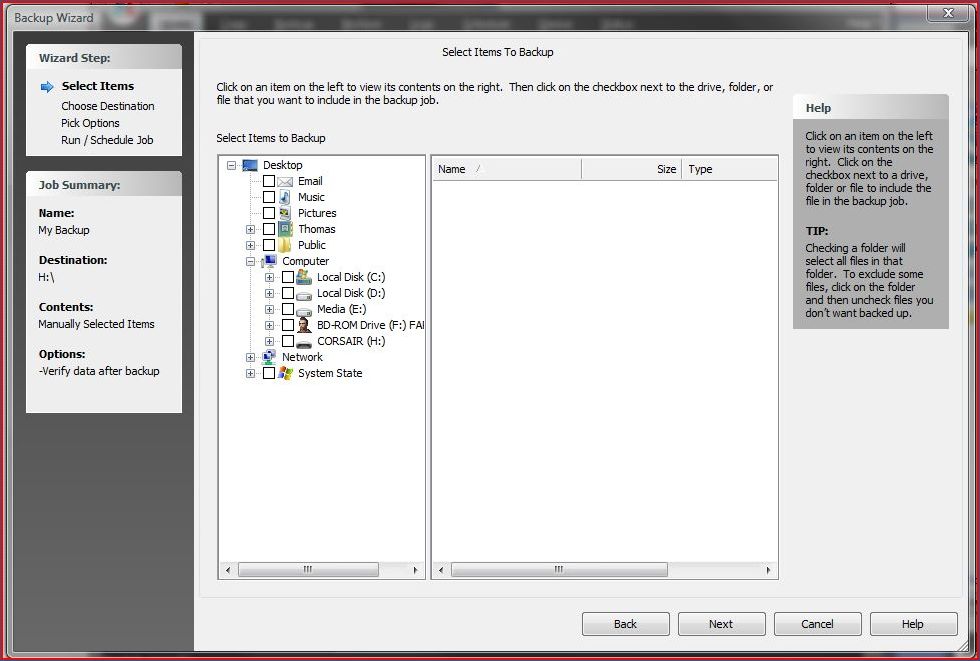
The next step only applies if you select ‘Let me select items manually’. An extra step is added in to allow you to choose your files and folders, using a folder explorer on your left which is expanded across to the right when a folder is selected. What you need to do is locate the folders you wish to backup,then tick the box next to them and they will be selected for backing up.
Â
Â
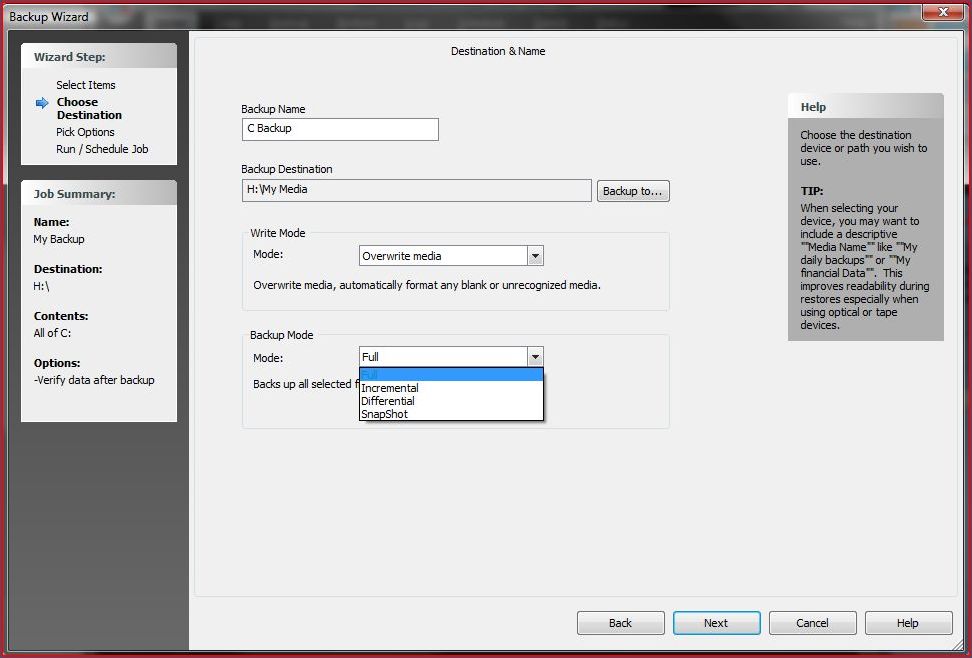
The next step is to define your backup, selecting what type of backup you wish to perform and how to store it. You can choose to either append or overwrite the existing media; either should work perfectly well. The option between Full, Incremental, Differential and snapshot are all fairly familiar. I feel Full and Incremental are the most useful, with Full just doing  a complete copy of all your data each time, whilst incremental only backs up what has changed since the last backup.
Â
Â
Next up we have what IÂ would call data handling. From this menu you can turn on/off data verification (IÂ would suggest leaving this on), enable or disable software compression (I would recommend leaving this off, unless necessary as it will almost certainly slow things down) and also change virus scanning preferences. For some reason these options were greyed out for me, despite the latest AVGÂ being installed – maybe it’s just not supported with AVG.
Â

Â
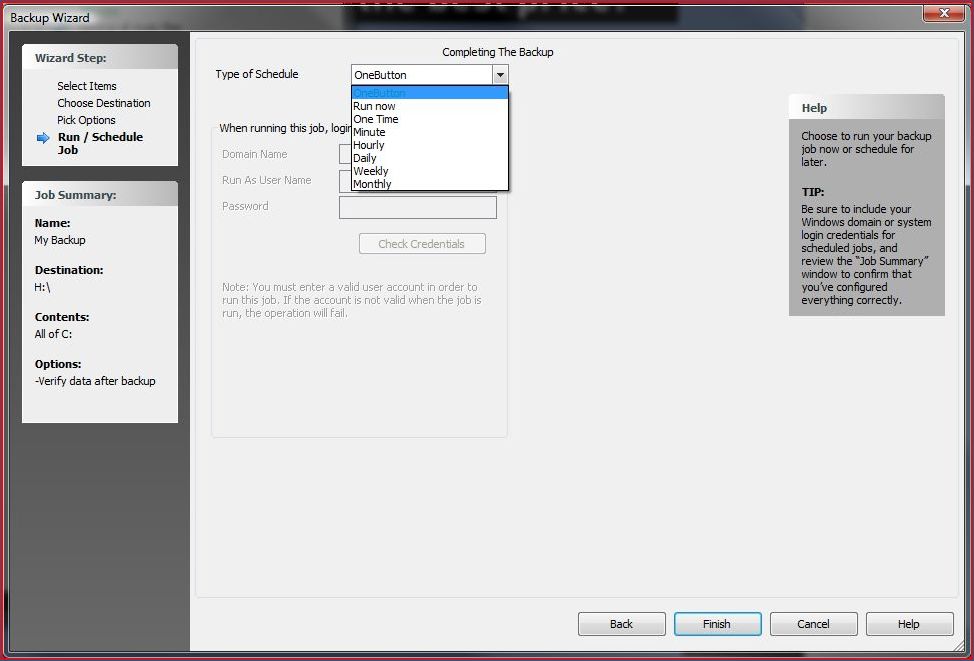
Having progressed through all the previous stages you will reach the final step. On this page the main feature is the ability to select what launches the backup. Selected by default is ‘OneButton’, which is triggered by the button on the front of the Voyager Port. There are various other options that run the backup on a schedule, but this defeats the whole concept of the Port.
Â
Â
Having successfully worked through the wizard, I am pleased to report that the software worked incredibly well. The integration with the Voyager Port worked flawlessly, and the activity icon in the system tray would spring into life the moment we pressed the button on the Port. Although our full Backup did take some time (it’s certainly nowhere near as rapid as HDD to HDD), it wasn’t unbearable. Once the initial Backup was done, incremental data backup was much faster, taking just a matter of minutes. Â Â Â