


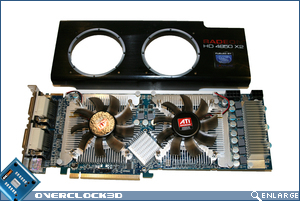
Sapphire 4850×2 2GB PCIe Graphics Card

In Detail
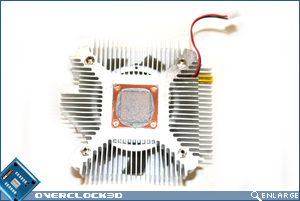
Removing the main shroud was simple enough with only 8 tiny screws holding it to the main heatsinks and not the card itself. This should allow easy cleaning of the card should the heatsink get clogged with dust. Looking closer at the cooling, we see that there are numerous heatsinks separated according to the sections requiring cooling.Â
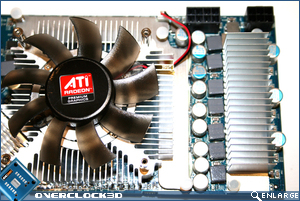
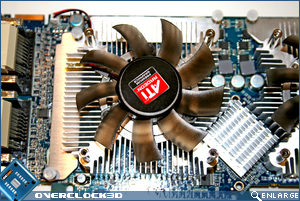
The main two heatsinks are attached via 2×4 screws from the back of the PCB which are also spring loaded ensuring an even mount. The remaining heatsinks for both the memory and the VRM’s are attached with push pins and are easily removed.
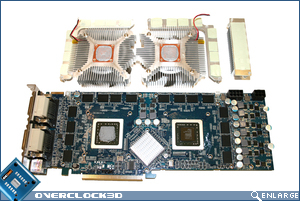
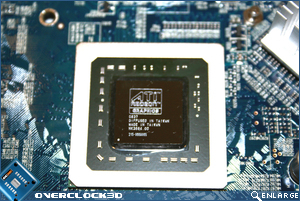
The paste used on the GPU appeared to be very good with an MX2 type consistency rather some form of cement. Giving both even coverage as well as being very easy to remove is a major plus for both those wishing to continue with the stock cooling and the watercoolers out there.

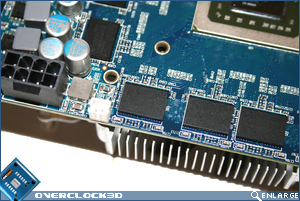
Below we see the GDDR3 memory chips from Qimonda. While IÂ would have liked to see DDR4 used, 2GB of that type would have no doubt increased the price of the card, so it appears Sapphire are satisfied with the bang per buck the Qimonda chips supply. Below right we see the Crossfire bridging chip which appeared to be glued onto the core itself as it would not budge regardless of heat applied.
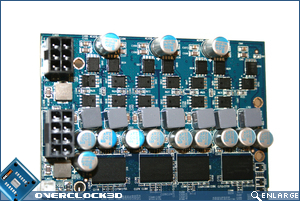
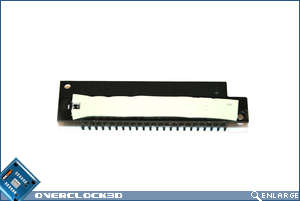
Below are the numerous VRM’s that are cooled by the aluminium heatinks both above and below the PCB. I do worry a little at the fact these heatsinks will not receive a fresh source of air and instead will rely on both the exhaust from the GPUs as well as ambient temps inside the case which may be counter productive.

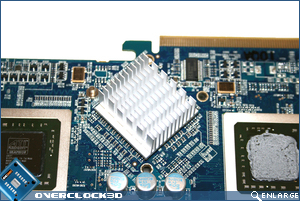
Below we see the rear of the memory heatsink which has thermal pads in place of paste which should be adequate. The main GPU heatsinks have copper plates affixed to aluminium fins and as you can see from the picture below the correct amount of paste is used to good effect resulting in a near perfect mount.


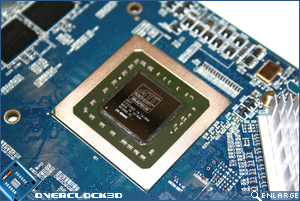
Above right and below left we see the top and bottom VRM sinks are also adorned with thermal tape and below right we see the RV770 in all its naked glory.
So that’s enough of the pretty pictures, time now to put this card to the test so head over the page to see our test setup and our overclocking results with the card.