


Thermaltake Spedo Advance Chassis

A Closer Look: Inside
Â
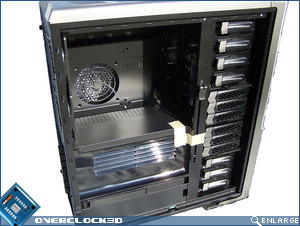
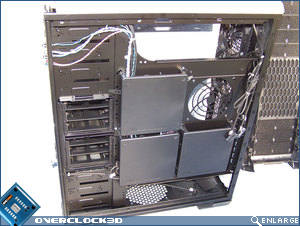
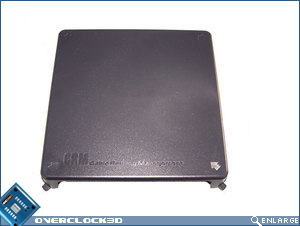
In the inroduction to this review I highlighted that the Thermaltake Spedo Advance chassis is designed to provide effective cooling to critical components housed within a PC. The inclusion of a vast array of cooling fans and mesh panels will no doubt help to achieve this aim, but Thermaltake use another trick to compliment the cooling effectiveness of this chassis – ATC (Advanced Thermal Chamber). You can see from the top (left) image that Thermaltake has included plastic baffling to help compartmentalise the chassis and help direct heat away from critical components like the CPU, GPU and power supply.
Â
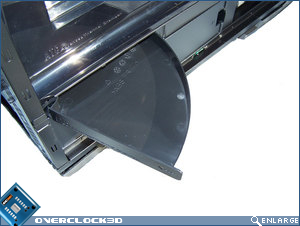
There are four parts to the ATC setup and they simply click into place courtesy of plastic clips. The cover that goes over the PSU area also features a neat swinging tray that can be used for placing screws and what-not into. The very top cover that goes over the GPU area features little plastic strips on its edge that helps it contour to the shape of your motherboard. Despite the fact that the ATC is constructed entirely of plastic it is quite solid and feels rigid enough to not fall apart during transport.
Â
Â
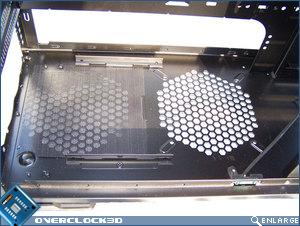
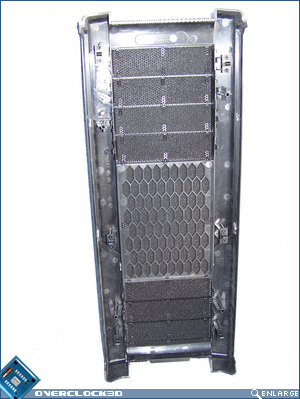
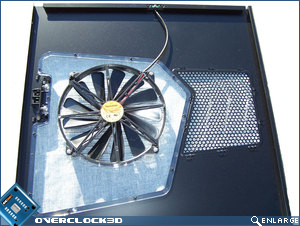
The Thermaltake Spedo Advance chassis has the PSU situated on the bottom. The PSU is allowed to draw cool air up from the bottom of the chassis and expel warm air out the rear. Thermaltake has also included some flywire mesh in order to eliminate dust issues associated with the location. Interstingly, Thermaltake hasn’t allowed the flywire mesh to cover the 120mm fan hole in front of the PSU area, so the threat of dust entering the chassis hasn’t really been reduced at all.
Â
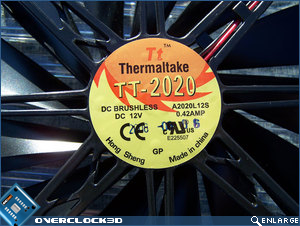
The Thermaltake Spedo Advance chassis has an adjustable Fanbar that can be used to attach a 120mm fan and have its direction adjusted for maximum effect.
Â
Â
Thermaltake has decided to do away with a a removable motherboard tray on the Spedo chassis, and instead opted for a permanently fixed one. Personally I’m a fan of a removable motherboard tray, but the increased height in the top of the case makes for light work when installing a motherboard. Thermaltake has also included plenty of routing holes in the fixed motherboard tray which makes routing cables and absolute breeze.
Â
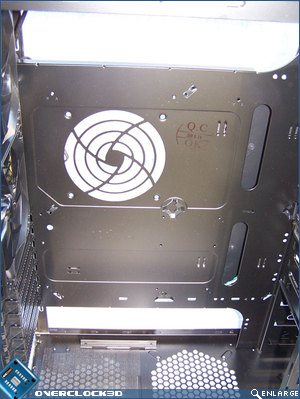
Interestingly, Thermaltake has included a 120mm fan hole in the tray itself which can be used to extract warm air out from behind the motherboard. How well this would work is debatable, but hey, something is better than nothing right?
Â
Â
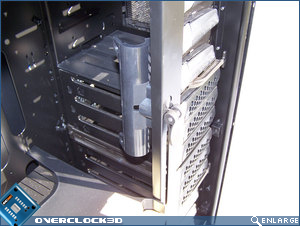
Like the top panel, the front bezel is also removable. The drivebay covers are easily removed from the front bezel by pushing two clips to facilitate their release. The covers also feature dust and noise reducing foam inserts. With the front bezel removed we can see the Thermaltake Spedo Advanced can cater for five 5.25″ bay devices on the top and three 5.25″ bay devices at the bottom. All 5.25″ bays feature Thermaltake’ tool-less design clips that make installing hardware really easy. Interestingly, the HDD caddy’s sit behind the 120mm fan at the front, but they can however, be moved to either the top or bottom 5.25″ bays courtesy of the 3.5 – 5.25″ bay adaptors found in the accessories box.
Â
Â

Â
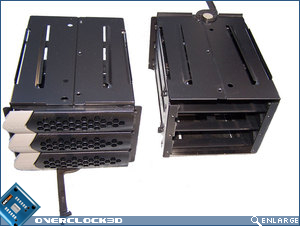
The HDD caddy’s themselves are very easy to move and/or install a HDD into. Each caddy holds three HDD’s and the installation process is again mad very easy because of the Thermaltake tool-less design. To install a HDD into the caddy, simply push the white button on the edge and the black mesh part releases the drive tray. With the drive tray removed, simply place your hard disk into the tray and push down on the four clips on the side that hold the HDD in place. The HDD is now ready to be installed back into the caddy. The hard disk tray is then held in place by locking the tool-less machanism back into place.
Â
Â
Thermaltake’ Cable Routing Management (CRM) system is inclusive of the holes in the motherboard tray, but at the same time provides a neater approach around the back of the motherboard. In its very essence, CRM means that cables out of sight are out of mind, and Thermaltake achieve this by including three 150mm x 150mm square plastic panels. The panels click into place over your cable routing job and essentially hide the rats nest of cables that usually end up lumped behind the motherboard.
Â
Â
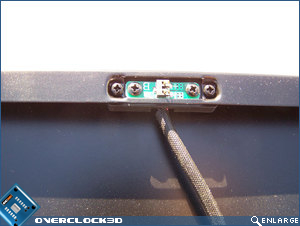
One other area of the Thermaltake Spedo Advance chassis that I realised I hadn’t covered was that of the 230mm fan on the side panel. What’s really neat here is that the fan doesn’t have a traditional molex connector on the end, but instead it has contact switch which is hard wired into the side panel itself. The other part of the contact switch can be seen in the 2nd lot of images from the top of the page (near the PSU area), and as soon as the door is closed the fan automatically starts spinning. When the computer is powered on of course! This is a great idea as it means that you don’t have to disconnect a molex plug before taking the side panel off – excellent touch Thermaltake!
Â
Â
Let’s head over the page to see how easily the Thermaltake Spedo Advance chassis is to get ‘kitted’ out with our test system…