


Corsair Obsidian 800D

Internals
Â
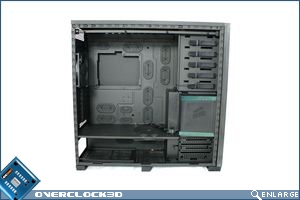
Removing the side panels and we get our first look inside, the first item that caught my attention was the motherboard tray cut out, as its much bigger than any other case on the market. With a cut out this big it means no matter what motherboard have you will be able to add and remove heat sinks and water blocks easily with out having to remove the motherboard.
Â
Â
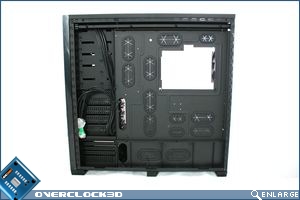
The case is plastered with cable management holes so it should help keep even the messiest of rigs tidy. With the PSU in the lower level plus cable management holes already in the back panel this will please many of you reading, there is also plenty of room behind the motherboard tray to hide all your cables. The 5.25″ Bays have tool-less mounts which helps make building faster.
Â

Â
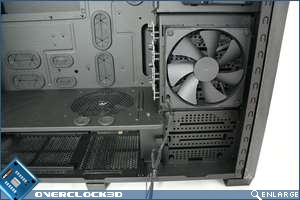
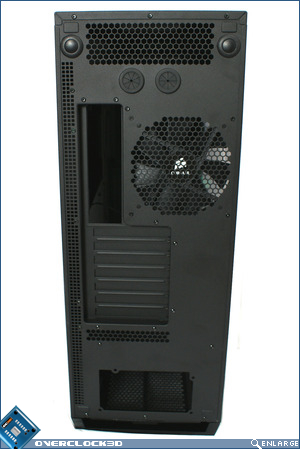
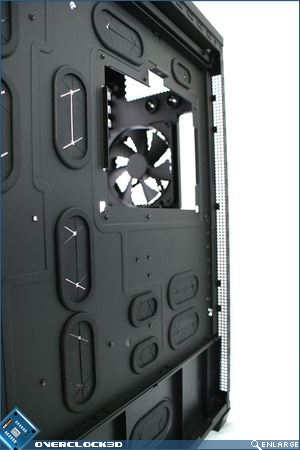
There is only a single 140mm intake fan for the main chamber, which is mounted in the dividing panel, its designed to suck air up from the PSU section of the case where the dust filter and vents are. This seems to be a very minimal approach to intake airflow so I am very eager to get this side of things tested. There is also a fan for the hot swap hard drives, this in a complicated fashion also pulls its air from the lower section with help of a shroud, but to make things even more complicated the airflow passes behind the motherboard tray and out the back of the case where there are even more vents. This seems amazingly complicated to me and before I do any testing I will say that I am sceptical to how efficient this will be. There is an additional mount for a 120mm fan for the lower 2 hard drives, this also has the same airflow pattern as the hot swap bay.
Â
Â
Head over the page for details on installation.