BitFenix Pandora Review

Up Close:Â Interior Rear, Roof, Reverse and Stripped
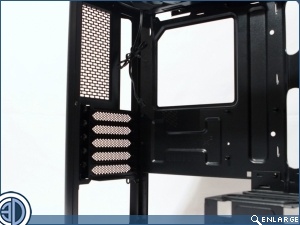
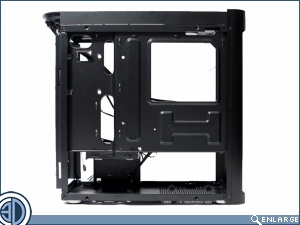
The narrow width of the Pandora precludes the use of a 120mm fan in the rear, with BitFenix thankfully eschewing the installation of a potentially noisy smaller model. Instead there’s a large area of mesh to aid ventilation. The roof however does have room for a fan and BitFenix have seen fit to include one of their Spectre units up there. Although strictly speaking there is room for more, only the one 120mm mount is present meaning that if you want to add more you’re going to have to get creative.Â

Â
The reverse side of the motherboard is very tight, and although there are plenty of cable tie points the physical space to work in is very limited with a maximum of 10mm down the left side channel and only 5mm in the area behind and adjacent to the actual motherboard. Life will be easier if you have a PSU with flat cables, but it will prove quite difficult to successfully route the 8pin CPU power cable in this space if you have more conventional round cables. There’s also space and a mount back here for a 2.5″ drive, but bear in mind you’re going to need to get cables to it.

Â
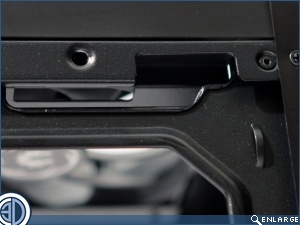
Although from the front cable cage it would appear that BitFenix perhaps intend at least a few of the major cables to routed anteriorly they do still include significantly spaced cable management holes. Sadly though, in a case that is otherwise so well appointed, and having such a big window these do not benefit from rubber grommets. The image below right shows the aperture in the top right hand corner for the 8 pin CPU cable to pass through. Just a shame it’s not big enough and is semi occluded by the motherboard once it’s in place. You can get the cable through here, but it’ll need a fair bit of wiggling and you’ll have to do it before you screw down your mobo.

Â
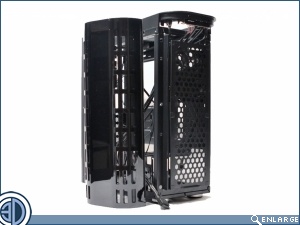
As taking the wrap-round sides off pretty much removes most of the front of the case all that’s really left to do is is pop out the front magnetically located dust filter and then remove the whole of the piano Black plastic front section. Behind this we find another of the Spectre fans and room for another 120mm unit. The mounting holes are all actually long slots meaning that not just fans but variable inter screw spaced 240 rads, or even a pair of 120mm rads can be fitted here. This is a particularly nice touch as it enables those who inclined to use a 120mm AIO for their CPU and another, perhaps in conjunction with the G10 bracket to be used to cool their GPU

Â
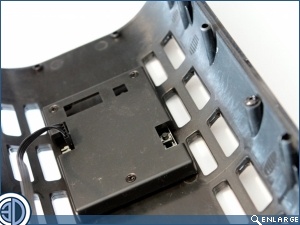
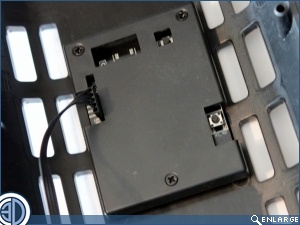
This unassuming piece of plastic, mounted on the rear of the front panel is actually the screen that enables the Pandora, via the ICON software to display images on the front of the case. It’s mounted via 3 screws and is linked to the motherboard via a USB cable. For those looking for Pandora on a budget the case is available without the screen option.