


Antec Skeleton

Packaging & Appearance
Â
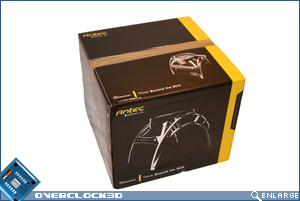
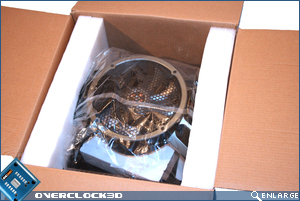
The Skeleton arrives in a gloss black cardboard exterior which is very thick and should be enough to stave off any unwanted dents and scratches. I was interested in how Antec were going to package the product due to its odd shape and perhaps more so due to its plastic design. I was therefore impressed to see that quality packaging was used throughout with 2 foam side panels holding the enclosure firmly in place. The Skeleton was also bagged in clear plastic to prevent moisture intrusion so the case should arrive to you in perfect condition.
Â
Â
I was impressed to see that the Skeleton is pre-built so there should be no frustration in getting started with building your system. which is just as well as the included instruction leaflet is sparse to say the least. I can appreciate that it is everyones responsibility to save money but a product such as this definitely needs an instruction leaflet to hand. There is a more thorough online instruction manual but that is of little use if your PC is in pieces waiting to be installed in a new Skeleton enclosure!
Â

Â
Â
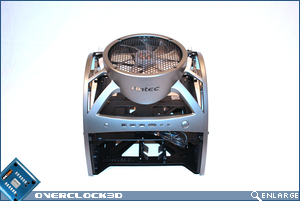
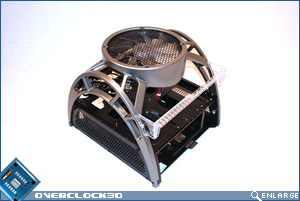
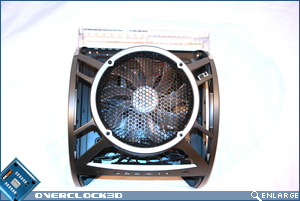
Well here is the Skeleton in all its glory. One word to sum it up, Marmite – you either love it or you hate it. The design is as odd as it is groundbreaking. Da-Vinci would not have gotten far as an inventor if he was afraid of changing the way people think, so then Antec have also taken this approach. For those above 30 years old reading this review then think back to Zoids, those plastic exoskeleton robots we all loved and you can formulate a feel for this radical new design. For those not of that age yet (you don’t know what you missed!), then consider the little nanobots from The Matrix and you are halfway there. I personally like the look of the case, industrial, yet futuristic and one thing is for sure, with that huge fan sitting abreast of the main component shelf, overheating should be a non-issue for all but the most insane overclockers.
Â

Â
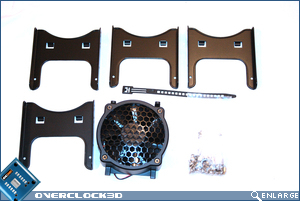
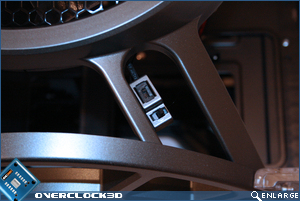
From the base of the enclosure we can see the sliding mechanism unique to the Skeleton which IÂ will cover more in the build section of this review. The accessories are pretty basic – four HD holders, a couple of tie wraps, a bundle of screws and a 92mm HD cooling fan with shroud.
Â
Â
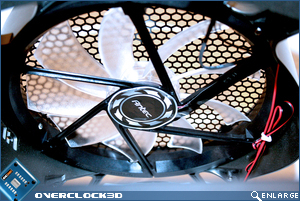
The fan itself is 250mm in diameter and is controlled by two switches. One switch for the fan rpm which can be set to three levels: low, mid or high. The other switch is used to alternate between blue, green, red , a mixture the colours or no light at all. The fan is protected by a plastic mesh fitting which will keep any stray fingers safe and is powered by a standard molex.
Â
Â
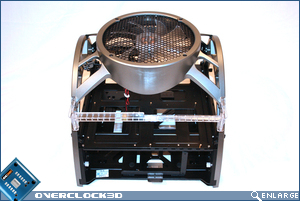
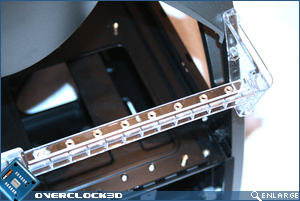
Above right we see a feature of the Skeleton which is a definite weakness, The flimsy acrylic PCI support has seven screw holes as opposed to the standard six which is a great idea, allowing users to add USB backplates etc. However the material used is not so great. We all know acrylic is brittle at the best of times but using it as a support, albeit not load bearing, is simply a bad design. It appears as more of an afterthought as it stands out aesthetically but for all the wrong reasons and a plastic or metal strut would be more in keeping with the skeletons gun metal grey theme.
Â

Â
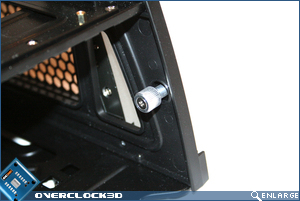
Access to the undertray is fairly easy thanks to the removable side panels that unhook with a plastic clasp. Again the plastic clasp is very flimsy and I doubt it would last the test of time. To release the component tray for full access to the Skeleton, Antec have made things very easy and this time, hard wearing. Two thumbscrews are all that hold the component tray in place and rackmount quality sliders ensure that the component tray simply glides out of the frame with minimum effort.
Â

Â
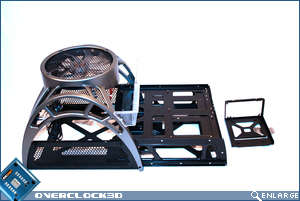
Perhaps the neatest thing about this case however, is its ability change components with the minimum of hassle. The main component tray slides fully from the main framework of the skeleton allowing easy access to your motherboard and components. Beneath the motherboard tray is where you are directed to install the PSU, which sits in its own little holder. Now here is the snag. The Skeleton will not fit long PSU’s such as the Enermax Galaxy or Silverstone Zeus series. Not only that but it is recommended you use a PSU with a rear mounted 80mm fan instead of the now very popular top mounted 120mm fan. The reason being is that the top mounted 120mm fan would have very little clearance from the motherboard tray and due to the Skeletons open style enclosure, installing the fan downwards is not recommended at all.
Â
Attached to the component tray is the motherboard backplate which is held in place by three screws. Once these screws are removed you can install your motherboard easily, then re-install the motherboard and backplate back onto the tray. Both the main component tray and motherboard backplate are steel so are both hard wearing but again, this is at the cost of weight.
Â
So then, with a slide out main compartment, removable motherboard backplate and removable side panels, building a system in this enclosure should be quite easy, yes? Head over to the next page to see how IÂ got on…