To ensure that all reviews on Overclock3D are fair, consistent and unbiased, a standard set of hardware and software is used whenever possible during the comparative testing of two or more products. The configuration used in this review can be seen below:
Processor: Intel Core i7 920 (2.66Ghz)
Motherboard: EVGA X58 3x Classified
Memory: 6GB Corsair DDR3 @ 8-8-8-24 1600Mhz
Graphics Card: NVidia GTX280
Power Supply: Gigabyte Odin 1200W
CPU Cooling: OCZ Gladiator
Hard Disk: Hitachi Deskstar 7K160 7200rpm 80GB
Graphics Drivers: Geforce 180.60 CUDA
Operating System: Microsoft Windows Vista Ultimate x64 SP1
During the testing of the setup above, special care was taken to ensure that the BIOS settings used matched whenever possible. A fresh install of Windows Vista was also used before the benchmarking began, with a full defrag of the hard drive once all the drivers and software were installed, preventing any possible performance issues due to leftover drivers from the previous motherboard installations. For the 3DMark and gaming tests a single card configuration was used.
The initial setup of the Classified presented no problems with sufficient clearance of the memory modules. However, using a wide heatsink such as the Thermalright Ultra in a horizontal position will block at least the first memory slot, if not the second. In a vertical position there should be no such issues. The only issue I could envisage is a conflict with the massive QPI heatsink. This heatsink may also become restrictive should anyone use a sandwich type cooler on a GPU. That said though, thanks to the ingenious PCIe jumpers, the PCIe slots can be changed top suit your setup. Our test GTX280 had no such clearance issues during testing.
One point worthy of special mention is the glowing, pulsating ‘e’ emblem on the heatsink. This insignia looks very attractive when illuminated and is sure to attract attention in any case with a window or indeed as it glows through the mist given off dry ice!
To guarantee a broad range of results to best evaluate the motherboards performance, the following benchmark utilities were used:
Synthetic CPU Test• Sisoft Sandra 2009
• PassMark CPU test
• SuperPI 1m, 8m, 32m
Memory Test
• Sisoft Sandra 2009
• Everest 4.60
File Compression & Encoding
• Sisoft Sandra 2009
• 7-Zip File Compression
• River Past ViMark
Disk I/O Performance
• HDTach 3.0.4.0
• Sisoft Sandra 2009
3D / Rendering Benchmarks
• Cinebench 10
• 3DMark 05
• 3DMark 06
• 3DMark Vantage
3D Games
• Crysis
• Far Cry 2
• Call of Duty 4
Overall System Performance
• PCMark Vantage
Power Consumption
Power consumption is an aspect often forgotten when it comes to enthusiast motherboards but in today’s climate, with rising utility bills special consideration needs to be taken when choosing you components as over a period of time, one components can prove to be much more expensive than another over its lifetime. Power consumption was measured at the socket using a plug-in mains power and energy monitor. Idle readings were taken after 5 minutes in Windows. Load readings were taken during a run of 3DMark Vantage.
As the two graphs above show, the EVGA Classified is by far the most power hungry motherboard on test. This I’m sure, will not deter any potential buyers of the motherboard as the target market are more likely to be interested in it’s performance rather than power efficiency. That said, every manufacturer has a responsibility to ensure they are doing everything they can to reduce our carbon footprints.
OK, thats enough of the environmental stuff, let’s take a look at what the board is designed for, overclocking and performance…
Overclocking
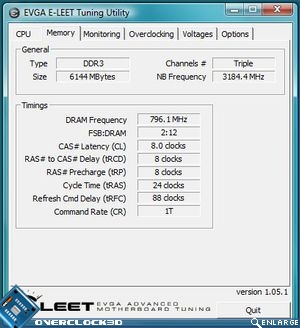
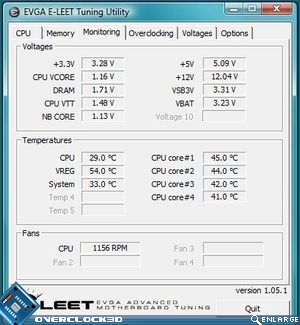
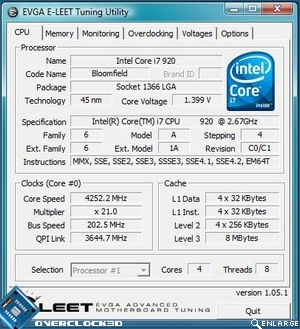
At this point in the review I would normally show you the obligatory CPU-Z screenshots at stock, however EVGA have a neat little utility which for the most part is an expansion on CPU-Z in that it allows basic overclocking within the windows environment. However before we get to overclocking here’s the setup in it’s stock format:
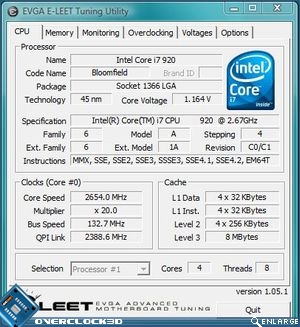
I was initially very happy with the temperature and voltage monitoring section of the small E-Leet program however, when compared to utilities such as Coretemp and RealTemp it was obvious that the E-Leet utility was under reporting temperatures by a fair margin, this was also mirrored by the on-board LED, which is a real shame but most likely because socket temperatures were taken and not core temps which we all know is the most important temperature to consider when overclocking. The voltage adjustment section was precise and all adjustments were instantaneous thus not requiring a reboot which was great and added to the ease of finding the maximum overclock.
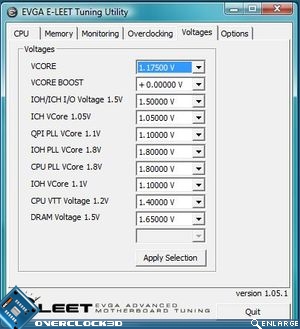
As with the voltage adjustments, the QPI and PCIe overclocking department was also instantaneous in its application. The benefits of this are that on the one hand you can achieve a higher overclock in windows due to the setup not having to go through the strenuous POST process where most motherboards will fall down when pushed too far. Maximum overclocks can also be achieved for those looking to show off those all important suicide benchmark runs. On the other hand, a quick and dirty overclock can be achieved before deciding a a permanent overclock via BIOS tweaking That said, as long as the settings you dial in are accepted without a BSOD, the BIOS setting will be automatically set to reflect your changes in windows, even better!
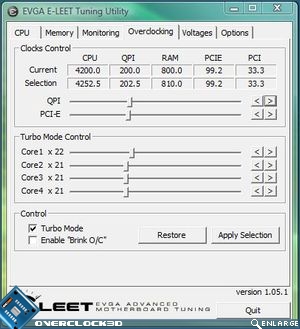
Using the utility I managed a blistering 4.252 GHz Overclock on our sample Core i7 C0 stepping which is just below the best overclock we have achieved with this CPU. I did try setting the overclock higher and managed a base clock of 205 which resulted in an amazing 4.3GHz! However this was totally unstable and crashed while running SuperPI so couldn’t be relied upon. However, with better cooling and higher voltage which this motherboard was designed for, I am certain this could be stabilised and even pushed higher, such is the prowess of the EVGA Classified.


