XSPC 290X & 290 Razor Waterblock Review and Fitting Guide

Fitting Guide:Â Strip Down
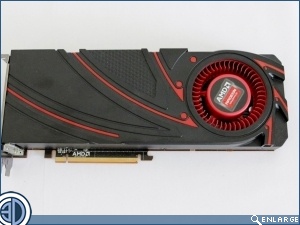
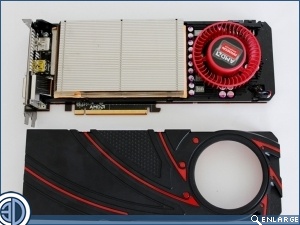
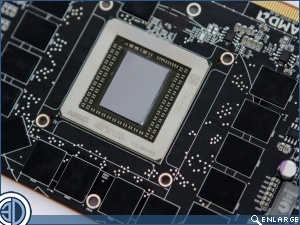
In the introduction we referred to the R9 290X/290 as a much maligned chip. In truth, there’s nothing wrong with it, it may have a tendency to run on the hot side but it’s actually a decent bit of silicon. The problem as we pointed out in our reviews of the early releases lay firmly at the feet of the shockingly bad reference cooler. As we’re fitting the Razor to our test R9 290 we thought as part of the process we’d also show you what lies within the reference cooler. As you can see, the answer is, not a lot really. When you see the size of the heat sink, and the paltry fan adjacent to it, the stove like temperatures experienced start to make sense.Â
Â
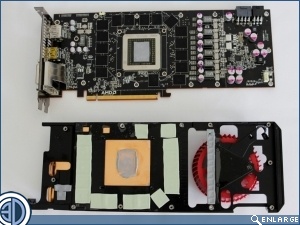
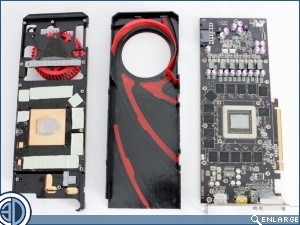
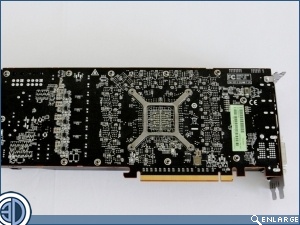
Of course lifting the cowling off the heat sink isn’t an essential stage in disassembling the GPU ready for the new waterblock but we thought we’d show you a bit more of what’s inside. What is actually required is that the multitude of small black screws on the rear of the GPU be undone and removed so that the PCB and Chip can be split from the cooler/cowling assembly. With this done. what you’re left with is what can be seen in the image below left. For those not used to dismantling GPUs we accept this can be a bit of a brown trouser moment and we would advise you to take things easy as too much force in the wrong place can lead to irreparable damage. Take things easy though and it should all come apart quite nicely.
Â
The cross shaped back plate will also be removed, and it’s a good idea to keep this along with all the screws you have removed with the body of the old cooler, should you ever wish to re install it or sell it on at a later date. It goes without saying that taking your GPU apart like this is also a pretty good way of voiding your warranty.
Â
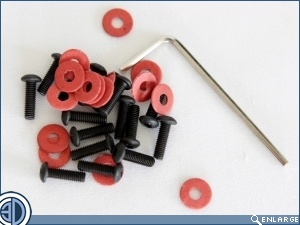
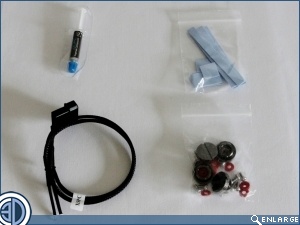
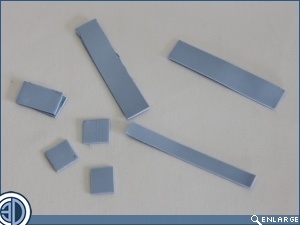
XSPC provide absolutely everything you’re going to need to reassemble your GPU with the new Razor water block attached. Included in the box are a syringe of TIM, screws, blanking plugs, fabric washers TIM strips and a dual blue LED cable with molex attachment for illuminating the acrylic layer.
Â
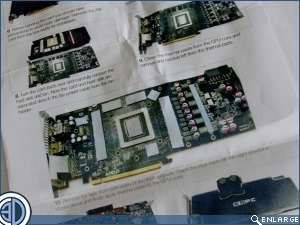
Although the instructions are just colour printed onto a sheet of A4 paper, they are extremely clear and helpful. XSPC make use of large full colour images to help guide you through the process. A separate instruction sheet is included in the back plate box, making it clear at which point you should depart from the main sheet and follow the revisions required for pack plate installation. It’s important you take the time to fully read both sheets as they specify for example that if using the back plate you should use the slightly longer set of screws supplied with the back plate.