Cooler Master V8 GTS Review

Up Close:Â Stripped
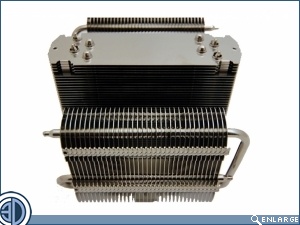
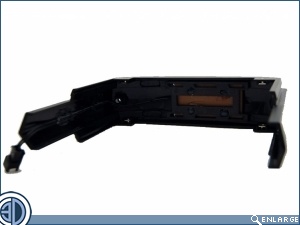
Although there are no instructions on how to take the V8 GTS apart it’s an easy enough job (Man card upgraded). Two hex bolts on the top of the unit at either end release the large central section, with two bolts on either side of the unit releasing the smaller fan shrouds and fans via a bolt though mechanism. The image below right shows the underside of the central section along with the mounting points for the upper red LEDs and their connection cable.Â
Â
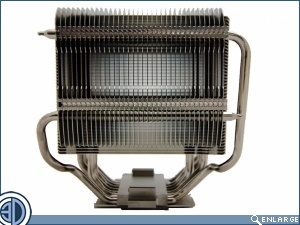
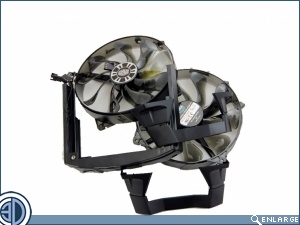
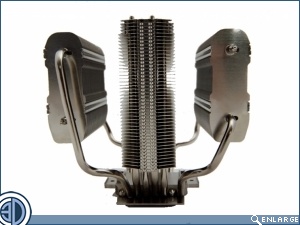
With the fans and the plastic fascia removed we get a much better view of the body of the heatsink.  It comprises of three separate fin stacks, the central and largest measuring 40mm across and the outer ones just 25mm across. The 2x140mm fans are sandwiched between each of the outer and the inner stack creating a sort of 3 way push/pull set up
Â
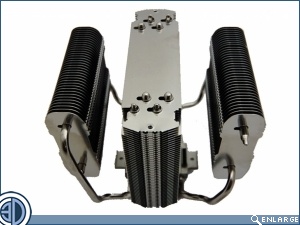
The eight 6mm heatpipes are split between the outer and central fin stacks. The main central fin stack is fed by four of the pipes, running as they do quite close to the edges of the stack. The other four pipes feed the outer stacks, with two pipes each, passing first vertically up to the stacks and then horizontally within so as to pass over each other from opposite directions. As with the central stack, the pipes are positioned quite close to the edge of the stack.